Last Updated on May 31, 2020 by Skillslelo
Excel has so many features that can save your time and increase your productivity. One of the features is Data Validation in Excel. This feature allows you to set up rules that determine what can be entered into a cell.
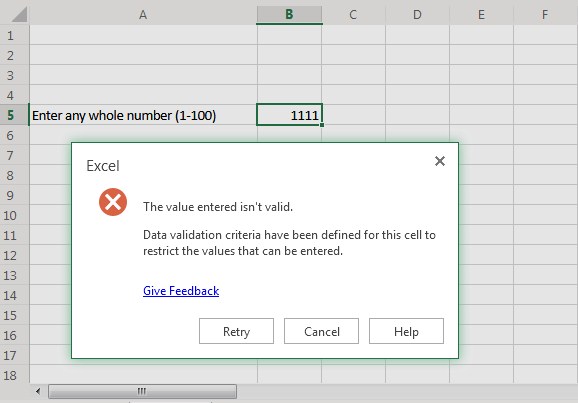
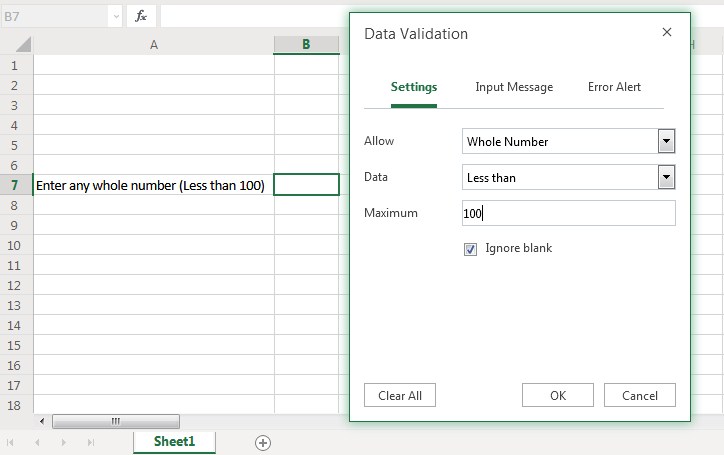
For example, you may want to limit data entry in a particular cell to whole numbers below 100. If the user makes an invalid entry, Excel displays an error message, such as below however you may customize error message as you like.
Open Data Validation Dialog Box and Set Criteria
To open Data Validation dialog box and specify the type of data allowable in a cell or range, follow these steps:
Choose Data ➪ Data Tools ➪ Data Validation. The Data Validation dialog box appears, as shown below.
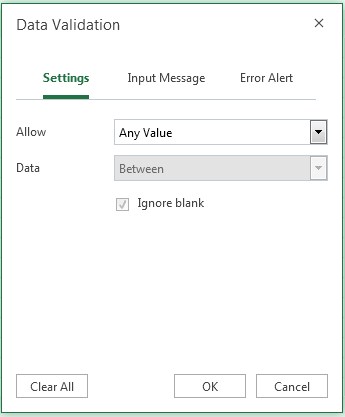
The Data Validation dialog box has three tabs: Settings, Input Message, Error Alerts.
Settings:
From the Settings tab, you can set a variety of data validation criteria according to your choice from the Allow drop-down list. The following options are available from the Allow drop-down list.
Any Value You can use this option to remove any existing data validation on cells. Note, however, that the input message, if any, still displays if the box is checked on the Input Message tab. Now let’s do it.
- Select your cells or range to remove existing data validation
- Choose Data ➪ Data Tools ➪ Data Validation. The Data Validation dialog box appears, as shown below.
- Select Any Value from the Allow drop-down list
- Click OK to close the Data Validation dialog box
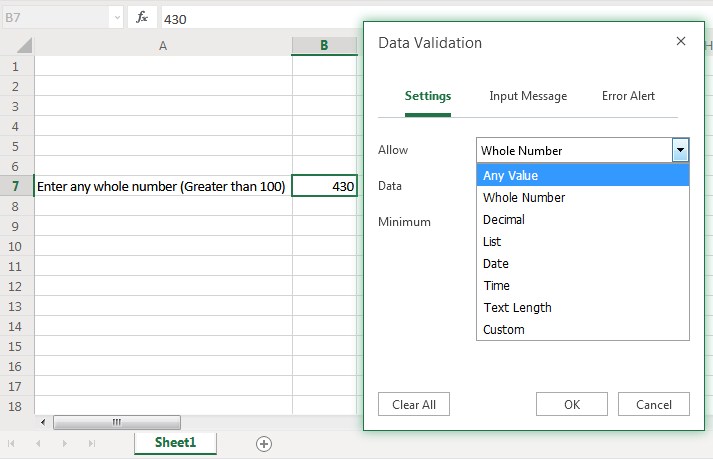
Whole Number The user must enter a whole number. You specify a valid range of whole numbers by using the Data drop-down list. For example, you can specify that the entry must be a whole number greater than or equal to 100.
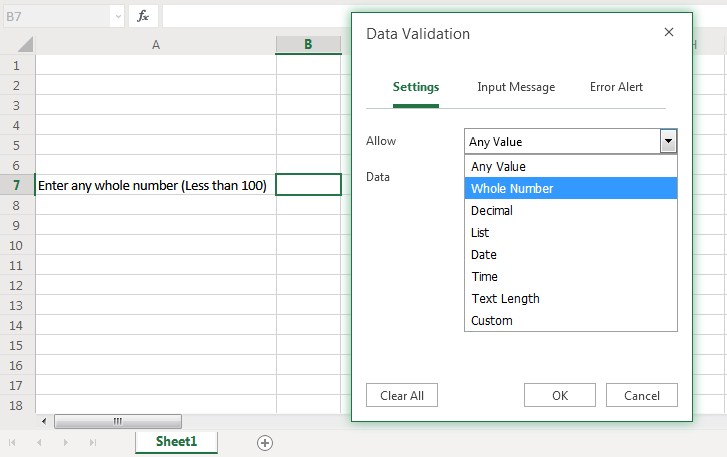
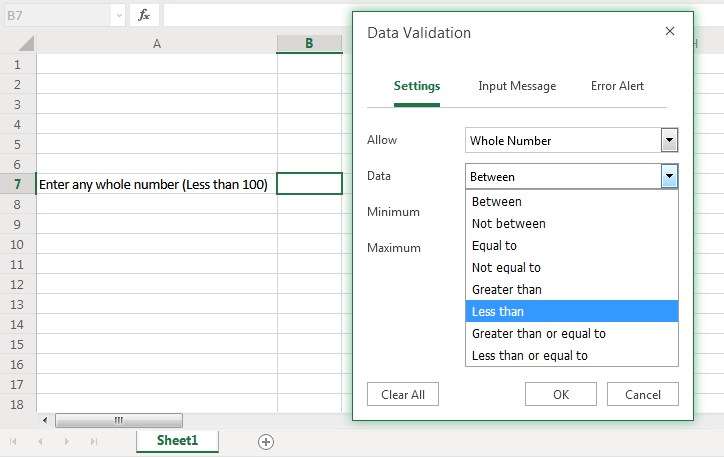
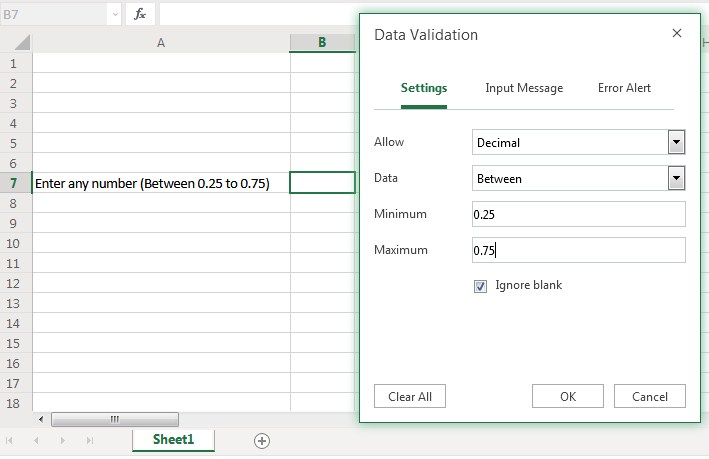
Decimal The user must enter a number. It has the same criteria options in Data drop-down list as whole number. Let’s do it. For example, you can specify that the entry must be between 0.25 and 0.75.
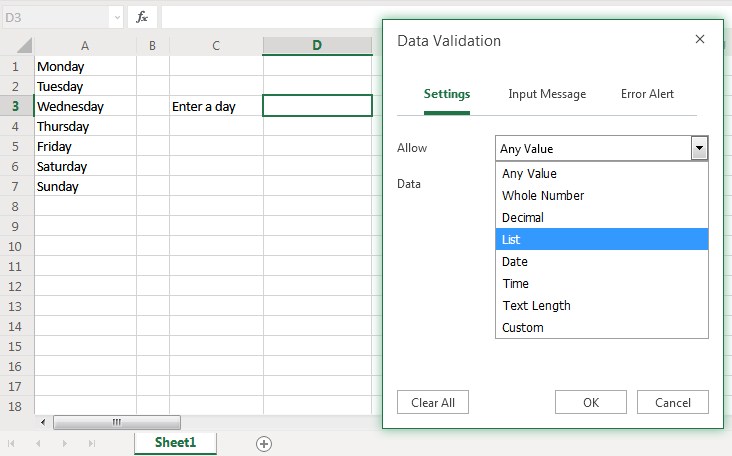
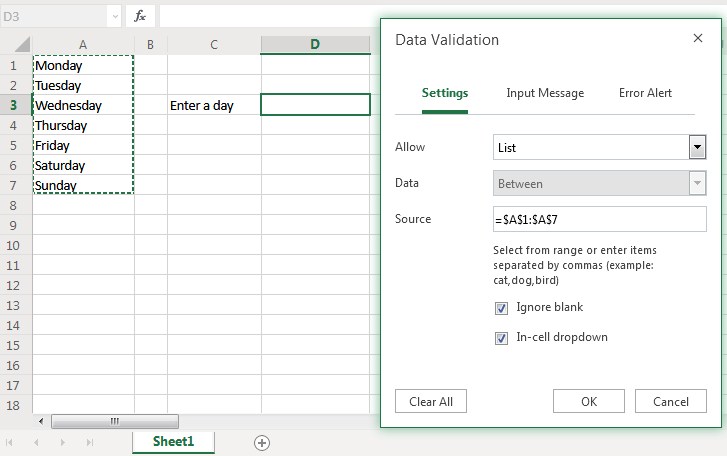
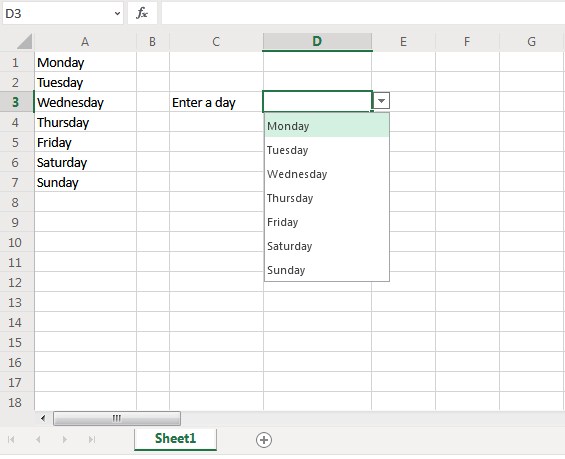
List One of the most common uses of data validation in Excel is to create a drop-down list in a cell. The user must choose an item from the list that you provide Let’s create a list that uses the days’ names in cells A1:A7 as the list source.
To create a drop-down list in a cell, follow these steps:
- Enter the list items into a single-row or single-column range. These items will appear in the drop-down list.
- Select the cell that will contain the drop-down list and then choose Data ➪ Data Tools ➪ Data Validation. The Data Validation dialog box appears.
- From the Settings tab, select the List option (from the Allow drop-down list) and select the range that contains the list, using the Source control. The range can be in a different worksheet, but it must be in the same workbook.
- click on OK to close.
Date The user must enter a date. You can specify a valid date range from the choices in the Data drop-down list. For example, you can specify that the data entered must be greater than or equal to April 1, 2019.
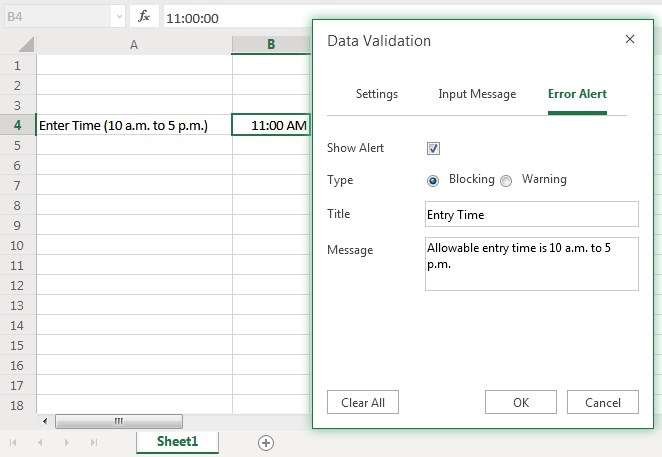
Time The user must enter a time. You specify a valid time range from choices in the Data drop-down list. For example, you can specify that the data entered must be between 10 a.m. to 5 p.m.

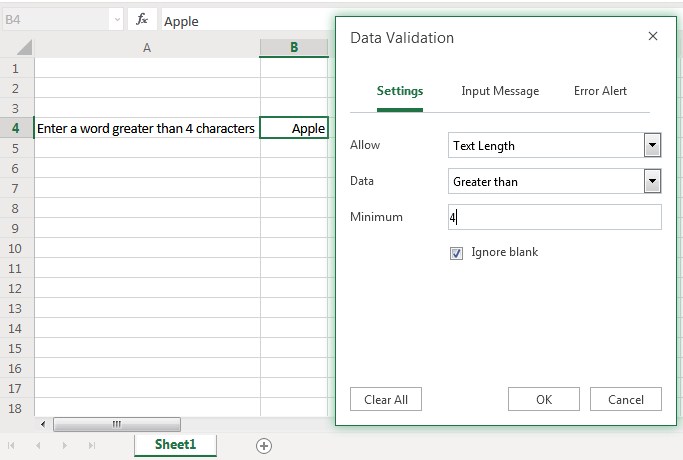
Text Length You can specify the length of data (number of characters) by using the Data drop-down list and the Length text box. For example, you can specify that the length of the data must be greater than 4 characters. See Example
Custom To use this option, you must supply a logical formula that determines the validity of the user’s entry. (A logical formula returns either TRUE or FALSE.) You can enter the formula directly into the Formula control (which appears when you select the Custom option), or you can specify a cell reference that contains a formula.
Input Message:
The most common use of data validation in Excel is to prevent a user from entering invalid data. You can use data validation as a component of your spreadsheet’s user interface without actually preventing the user’s entry.
Data validation provides a way to display a message when the user selects a cell. Normally, this message would tell the user what would be considered invalid data for that cell to prevent them from getting the error message (when they actually enter invalid data).
Let’s do it with an example giving a suggestion message to enter data into the cell.
- Select the cell on which message will appear.
- Choose Data ➪ Data Tools ➪ Data Validation. The Data Validation dialog box appears.
- From the Input Message tab, Give the title in theTitle text-box and Write your message in the Message text-box.
- Click on OK to close Data Validation dialog box
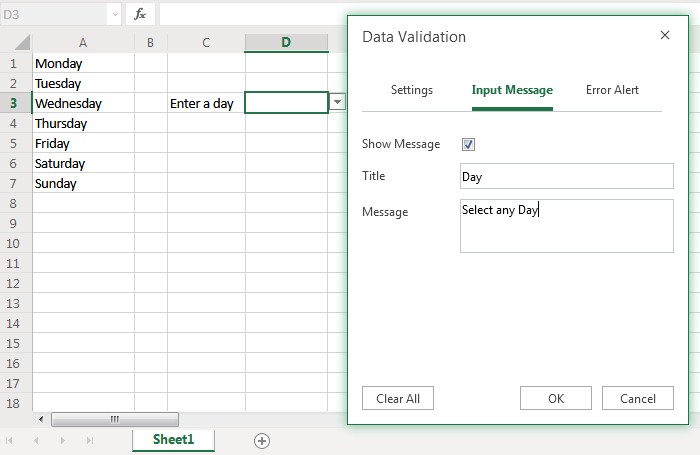
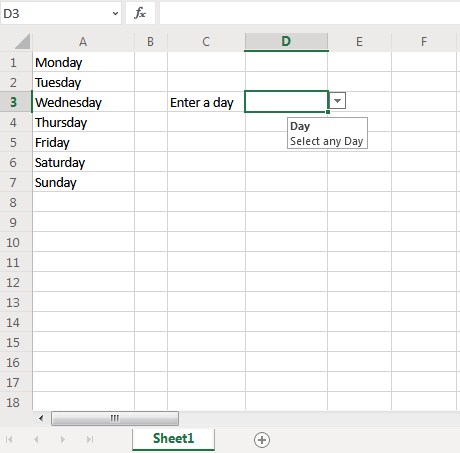
You can use Input message for anything. To do this , first you have to select the cell on which the message will display and then click on Allow drop-down list and set to Any Value, so you will not be prevented from entering anything into this cell.
Error Alerts:
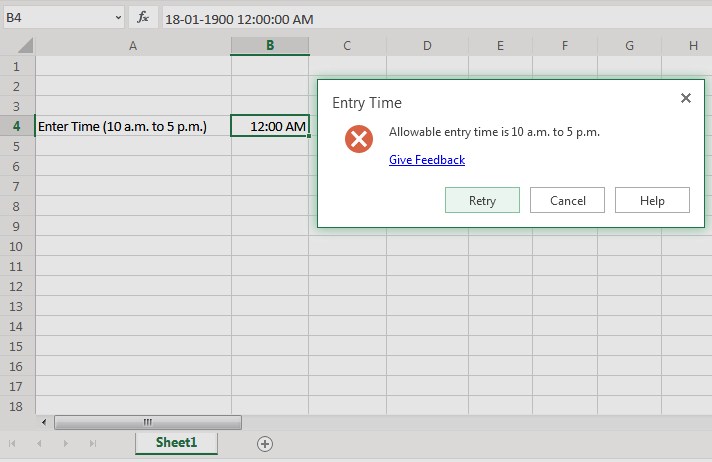
If you enter invalid data into a cell that has some data validation criteria, Excel displays an error message and prevent you from completing the entry of invalid data.. This error message can be customized. You can set your own message.
There are two other options, Warning and Information, which will allow the user to enter data. You can also deselect the check box and Excel will not show any message.
Set an Error Alert message , follow these steps:
- Select the cell on which message will appear.
- Choose Data ➪ Data Tools ➪ Data Validation. The Data Validation dialog box appears.
- From the Error Alert tab, Give the title in the Title text-box and Write your message in the Message text-box.
- Click on OK to close Data Validation dialog box
See example of Error Alert

useful information
Nice post. I used to be checking constantly this blog and
I am impressed! Very useful information specially the ultimate section 🙂 I deal with such information a lot.
I was seeking this particular info for a very long time.
Thanks and best of luck.